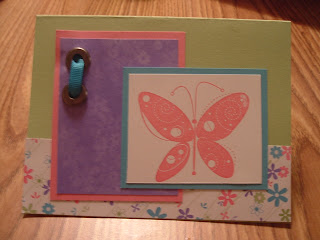
Here are this months cards. Jen and Tammy will both have their's next month as well, so I guess you can't feel too bad Trish and Mom ; )
This one is my card. I think I'm obsessed with the "Thanks a Melon" theme. I borrowed Laura's Doodlecharms for this one. You have to untie it to open it and it has the message on the inside. This one is Delaina's. Once again I love her paper. I don't want to know how much time it takes her to make all of the cards though!
 This one was made by our newest member, Aubrey. It looks like she cut the "Thank You" phrase from an existing Thank You card. I think that is an awesome idea for reusing old store-bought Thank You cards!
 This one is Laura's and I'm sorry that I was too lazy to flip the pic! She used Cuttin Up -- I love that font. You pull the paper out from the top to write your message. Cute paper :)
Monday, March 31, 2008
For all you slackers out there ....
Posted by The Jessee Journal at 11:26 AM 0 comments
Tuesday, March 11, 2008
card swap
Hey trish, I hope you check this. The card swap has been moved to the 19th.
Posted by The Jessee Journal at 9:22 PM 0 comments
Monday, March 10, 2008
stamping site
As if everyone needed another stamp site to look at ; ) I like this lady's work -- very simple and pretty. PLUS she does tutorials for ALL of her detailed projects. She has the link to her video tutorial site on this one.
http://www.chicnscratch.typepad.com/
Posted by The Jessee Journal at 9:55 AM 0 comments
Wantsies
I want a paper crimper so I can make these :( They look so cute (even cuter without the tag in my opinion)
http://www.splitcoaststampers.com/ee/index.php/resources/tutorials/sour_cream_container/
Posted by The Jessee Journal at 9:54 AM 0 comments
Friday, March 7, 2008
Card swap


Here are the two "Hello" cards from my Feb. church card swap. I'm posting because I am pretty bored ;) btw, the background "chicken fence" pattern is a stamp.
Posted by The Jessee Journal at 7:59 PM 1 comments
Sunday, March 2, 2008
Step 2
Posted by Tricia at 9:04 PM 0 comments
Step 1
Posted by Tricia at 8:58 PM 0 comments
Mini Gift Bag Instructions
Supplies:
6x12 double sided cardstock
adhesive
Ribbon
Small Hole Punch
Tag
Cricut Cart Box
Scoring Blade (opitonal but I find its easier to use one)
When we put our bags together we used SUs terrifically tacky tape. I love this stuff, I am definitely going to be ordering some next time. A glue stick would probably work but if you have something stronger I would probably use that. When you are putting it together you have to pull the paper tight and you want something that will bond fast and strong.
Posted by Tricia at 8:50 PM 0 comments
3D Project
Posted by Tricia at 8:40 PM 0 comments
Feb SU Club Cards
Posted by Tricia at 8:32 PM 0 comments


