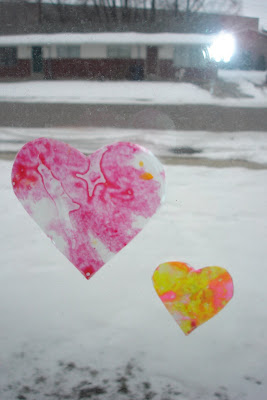

Shay and I tried out a Martha Stewart Valentines decoration. Ours definetely did NOT look like hers :) I don't know what magical crayons she used, but hers look professional and ours look homemade. Go figure ; ) We had fun, though the pictures don't really do them justice. They do look pretty with the light coming through the window. When it is dark, well, they aren't nearly as impressive. Here is the link for the tutorial:
Tuesday, January 29, 2008
Valentine window decorations
Posted by The Jessee Journal at 11:03 PM 1 comments
Sunday, January 27, 2008
Did you ever know that youre my hero??
Posted by Alysssssa. at 9:20 PM 1 comments
Tuesday, January 22, 2008
Awesome tutorial!
I found this awesome tutorial through the cricut board. It givers great directions for making your own "milk carton" treat box using paper! I think it would be great for a Valentines treat box for Shay.
http://www.splitcoaststampers.com/resources/tutorials/milk_carton_box
Here is the direct link for their full gallery of tutorials:
http://www.splitcoaststampers.com/resources/?resources
They have some really fun projects -- esp. for those of us who don't have TBBM!

Posted by The Jessee Journal at 3:28 PM 0 comments
Monday, January 21, 2008
Because...

Just because I know how much Tricia LOVEs those large flowers, I had to post this card : ) haha. I don't think any instructions are needed on this one:D
Posted by The Jessee Journal at 2:07 PM 1 comments
Jan. card swap, Delaina and Laura
 Laura's card is the one on top. She used her cricut designstudio! Go her!! She used it for the scallops and circles on the top. The purple page with the flower attached comes up and out of the flowered envelope. So cute :)
Delaina's card is the one on the bottom. I don't know about you guys, but this looks like the stuff they print in magazines -- I wish I had that card making talent.
Also, because I forgot to mention it in the e-mail I sent, this month we have 7 cardswappers. Dale's girlfriend, Jen, joined the group! (and Tammy will be doing it now).
Posted by The Jessee Journal at 1:59 PM 0 comments
Saturday, January 19, 2008
January Card Swap - Valerie
Posted by Tricia at 11:33 PM 1 comments
January Card Swap - Tricia

Posted by Tricia at 11:13 PM 0 comments
Things Are Looking Up!
Well things are better since I last posted. Dad and I got the computer up and running again, well actually the credit really goes to HF we couldn't have done it on our own. I stopped at a discount electronics store and picked up a new card reader for ten bucks. It works like a champ. (as Dad would say) Plus it will also work with the cards that dad uses in the pacmate (or matey as Chelsee calls him) so he doesn't have to buy a new one when he has to do updates. Well I have already met one and a half of my new years resolutions. My blog was up by the 15th of the month even if I didn't post anything until a day or two after. I am now posting my first project of the year I just have to continue every two weeks minimum. So far we are doing fabulously about posting our projects:)
~Tricia
Posted by Tricia at 10:58 PM 0 comments
Wall Decor
This is my own twist on those wall-decor-phrase things. I wanted something a bit more scrappy and homemade and this is what I got. I did my last name, but it's also really cute to do with first names and buttons instead of ribbons. Just use what you have. I ran to the hardwood store and bought a scrap piece of wood, some paper and some letters to make it easy on myself. I also used some brown paint I had lying around to make the letters a uniform color. The dots are actually flowers I had. So if you want to break away from the oh-so-popular rub ons make it yours and make it fun!
Posted by The Rowleys at 9:36 PM 3 comments
Friday, January 18, 2008
Visiting teaching reminder magnet


This project was part of a vising teaching workshop i attended. The project required one long sheet of cardstock (folded over and stapled to make a pocket) and three smaller rectangles to make the patterned/solids that are the decoration. You'll also need a piece of cardstock to put in the pocket, vinyl with the words "visiting teaching" printed on it, and a brad to hold it in to place. If you would like the dimensions to all of these peices, please e-mail me.
Posted by The Jessee Journal at 3:00 PM 7 comments
Shape cards

Yet another in the homemade (not necessarily) craft category. I used some unwanted sheets of cardstock, cut them into cards and then spent 5 minutes with my baby bug to cut out shapes from the George cart. Literally the project couldn't have taken more than 10 minutes of my time from start to finish. The result is a stack of cards that can be turned into several different games or used as flash cards. Within one day Shay had mastered all of her shapes. They are definetly worth laminating and saving for the next kid.
Posted by The Jessee Journal at 2:53 PM 0 comments
Glass magnets


This is an incredibly simple project -- so I love it =) Simply trace your paper along the shape of your flat, clear, glass bead. Cut out and decoupage onto the back. Stick on a magnet and you have a pretty fridge decoration. For the ones with words, I typed the words on the computer, printed on the patterned paper and then cut out for the magnet. They made a great handout for a church class. I think these would also be a fun house-warming gift if you found out what colors their home was decorated in.
Posted by The Jessee Journal at 2:47 PM 0 comments
ABC Book


I don't know if this is a "craft" but it was homemade so I thought I would post it here =) This is an ABC book that I made for my daughter. I copied the text from www.theideadoor.com and then typed it up into a word document, with two letters per page. I simply glued on the pics and then took it to Kinkos to have it laminated. I still need to buy metal rings, but for now it is held together with ribbon.
Posted by The Jessee Journal at 2:30 PM 3 comments
Bag Toppers!


These are not incredibly original, but it was my first time making them =) Generally I would try to match my papers to the candy inside, but this time around I was just trying to use what I had on hand. They did take longer than I thought, but they're really fun. I think they would make great goodie bags for a party/shower. (I used my stamped cart for the font)
Posted by The Jessee Journal at 2:26 PM 0 comments
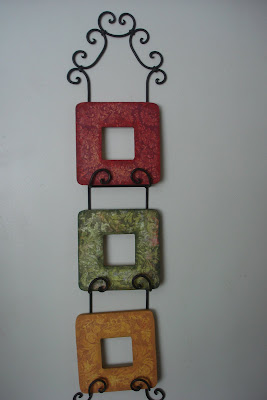
Decoupage Frames

This is a quick and easy home decorating project. Simply buy some unfinished wood frames (I purchased mine at Roberts for $2 each). Trace your frame onto the paper you will be using, cut it out and decoupage it on (I use ModPodge). Afterwards I paint the sides in a color to match my paper, feathering the paint a bit on top of the paper edges to give it an antique look.
This total project, (frames, paper, and metal rod holder) cost me only $16.
Here is a close-up (though the colors are way off ...)
Posted by The Jessee Journal at 2:18 PM 0 comments
Thursday, January 17, 2008
The First Post of the Blog!
In order to make the post title to be truly effective you have to say it in a William Hurt/Polar Express voice:) If you are wondering about the beach themed background I picked it because it reminds me of warmer weather ahead. Over the past several weeks it has snowed several times, not a whole lot but enough to remind you that winter is definitely here. I know that when its summer I will be begging for the cold weather. Anyway, to the point of this blog. I had originally decided it was so that the Crabbs and the Jessees could share pictures of the craft ideas we were working on. I then thought, why limit it to just those people? It is now open to those of Marcie's family who are interested as well as a very select group of friends. If you are interested in posting please e-mail me or Marcie. and we will set you up. Unfortunately I will not be posting any pics today of the cards I made for the family swap. As some of you know Dad's computer has crashed and so we are praying we can get it running long enough to get everything off. Luckily I have my own computer but I still feel terrible for dad! Not only does the computer not work but neither does the card reader I use to get my pictures off my camera card. The reader died a little while ago so we bought a new one but I just found out that the new one is too small for my card! Not only is the computer and the card reader dead but so is Dad's watch and the wall charger for my ipod! The ipod charger has never worked so we will take it back to the store tomorrow. I think we have some serious bad luck going on! Well enough depressing stuff. Okay Marcie I have created the first post its your turn to supply the pictures.
~Tricia
Posted by Tricia at 8:12 PM 0 comments


